Kelpro Oil Seal
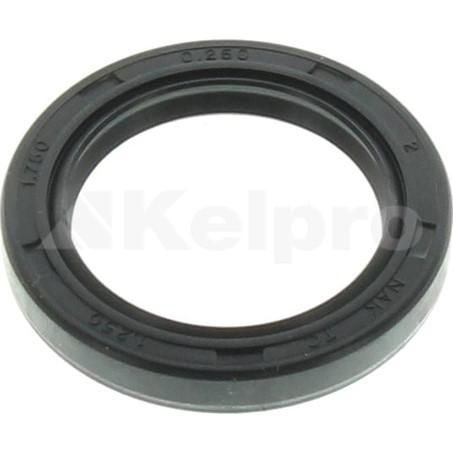
Kelpro · Part number 97242 · NZ$18.00 incl. GST
G'day! An Oil Seal is a critical little worker, keeping your vehicle's lubricants where they belong and kicking out the nasties, ensuring everything runs smoothly and lasts longer. This KELPRO option is a solid choice, and we've got plenty more from trusted names.
Price
NZ$18.00 including GST. Part number 97242.
Fits these vehicles
- Bedford CF (1973–1978)
- Chevrolet Camaro (1966–1968)
- Chevrolet Camaro (1967–1969)
- Chevrolet Camaro (1970–1971)
- Chevrolet Camaro (1972–1974)
- Chevrolet Camaro (1978–1979)
- Chevrolet Camaro (1981–1992)
- Chevrolet Corvette (1959–1961)
- Chevrolet Corvette (1962–1964)
- Chevrolet Corvette (1962–1964)
- Chevrolet Corvette (1962–1965)
- Chevrolet Corvette (1962–1965)
- Chevrolet Corvette (1962–1967)
- Chevrolet Corvette (1962–1967)
- Chevrolet Corvette (1963–1965)
- Chevrolet Corvette (1963–1965)
- Chevrolet Corvette (1964–1967)
- Chevrolet Corvette (1968–1970)
- Chevrolet Corvette (1970–1971)
- Chevrolet Corvette (1973–1981)
- Chevrolet Corvette (1974–1975)
- Chevrolet Corvette (1975–1978)
- Chevrolet Corvette (1977–1978)
- Chevrolet Corvette (1983–1984)
- Chrysler
- Chrysler
- Chrysler Chrysler (1971–1975)
- Chrysler Valiant (1969–1970)
- Chrysler Valiant (1969–1970)
- Chrysler Valiant (1969–1970)
- Chrysler Valiant Charger (1971–1973)
- Chrysler Valiant Charger (1971–1973)
- Chrysler Valiant Charger (1971–1973)
- Chrysler Valiant Charger (1971–1973)
- Chrysler Valiant Charger (1971–1973)
- Chrysler Valiant Charger (1971–1973)
- Chrysler Valiant Charger (1971–1973)
- Chrysler Valiant Charger (1973–1975)
- Chrysler Valiant Charger (1975–1976)
- Chrysler Valiant Charger (1975–1976)
Description
Oil Seal Replacement: Keeping Your Ride Leak-Free and Loving It!
> Right then, let's talk oil seals. These unsung heroes are absolutely vital for keeping your vehicle's guts happy. They're like the bouncers for your engine, transmission, or diff – stopping precious lubricants from escaping and, just as importantly, keeping all the grubby road muck, water, and dirt out. Over time, the materials can get a bit stiff, crack, or just wear out, leading to those annoying leaks that can really mess with your vehicle's performance, especially with all the diverse conditions we tackle on Kiwi roads.
How to Spot a Leaky Seal (Before It Becomes a Real Drama):
• Seeing tell-tale drips or grease smears around those spinning bits like the crankshaft, camshaft, or axle shafts? That's a big clue.
• Are your fluid levels dropping faster than a hot chip at a BBQ? Could be an oil seal letting you down.
• Notice other parts looking all greasy and contaminated? Leaking fluid can spread, making a mess of brake pads or clutch discs.
• Hearing any funny noises from bearings or moving parts? Insufficient lube due to a leak could be the culprit.
Will This Pass the WOF?
Look, a tiny 'weep' might just get a pass, but if that oil is really gushing out and could pose a risk to the environment or, even worse, contaminate your brakes, then you're looking at a big fat WOF fail. Getting those leaks sorted pronto isn't just about passing the WOF; it's about keeping everyone safe and sound on the road.
DIY or Call in the Pros?
Difficulty: 6/10 (This can jump around a fair bit depending on where that pesky seal is hiding!)
Estimated Time: 2-8 hours (Seriously, accessibility is EVERYTHING here!)
Tools You'll Likely Need: Your standard toolkit, a seal puller (a lifesaver!), a seal installer (or a socket that fits just right), a trusty torque wrench, jack and stands (safety first, always!), and some drain pans.
🛠️ Bob's "Get It Done Right" Companion Checklist
Before you dive in, make sure you've got these bits and pieces handy. It'll make the job smoother and safer, trust me!
• Safety Glasses: Protect those peepers from splashes and debris. No one wants an eye full of old oil!
• Heavy-Duty Nitrile Gloves: Keep your hands clean and protected from grime and chemicals. Nitrile Gloves are a must-have.
• Workshop Rags: For mopping up spills and keeping your workspace tidy. Workshop Rags are your best friend here.
• Oil Drain Pans: Essential for catching all the old, dirty oil. Don't want that stuff all over your driveway!
• Rust Penetrant: If you're dealing with stubborn, seized bolts, a good spray of Rust Penetrant can save you a world of pain.
Bob's Top Tip:
Bob @ CARFIX absolutely reckons you should swap out any worn or leaky oil seals as soon as you spot them. Seriously, a small leak can turn into a massive, expensive headache for your engine, transmission, or other vital systems faster than you can say 'she'll be right'! This KELPRO A1097588 oil seal is made to the same high standards as the original parts, giving you top-notch durability and a proper seal. Don't let a tiny drip become a major drama!
Got a question or not quite sure what you need? Bob @ CARFIX is always keen for a yarn and can help you pinpoint the exact part for your ride. Pop over to Bob's Shop for a good old chat!
Fitment Notes
This KELPRO oil seal is generally suitable for a wide range of vehicles. Always, and I mean ALWAYS, double-check the part number against your vehicle's specific requirements and the manufacturer's specs to make sure it's the perfect fit. No one wants to do a job twice!
---
🛠️ Bob's Pro Tip: Do the Job Right!
> If you're replacing this oil seal, make sure you've got the right workshop prep, protection, and safety gear ready. Taking a bit of extra time and using the proper safety stands and cleaners makes all the difference for a professional result!
🧰 What Else You'll Need:
• Safety First: Always secure your vehicle on heavy-duty safety jack stands before working underneath. Never rely solely on a hydraulic jack.
• Clean Hands: Keep a pack of Nitrile Gloves handy to protect your skin from grease, oils, and chemical sprays.
• Preparation: Have microfibre towels and a suitable parts cleaner nearby to keep components clean during installation.