TRW Brake Pads Set (DB1774)
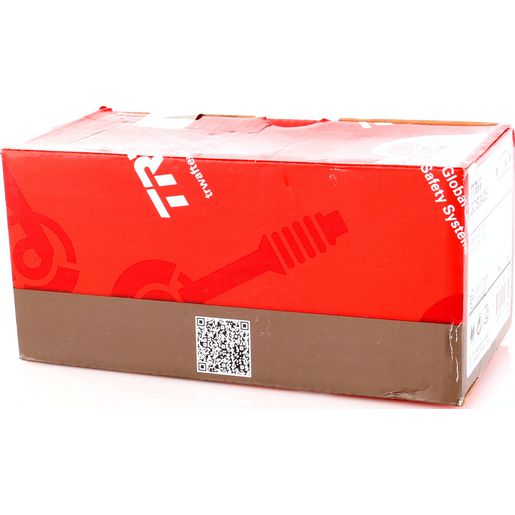
TRW · Part number GDB3435 · NZ$213.00 incl. GST
Need new brake pads for your Mitsubishi L200/Triton? These TRW pads will sort you out! Brakes are kinda important, especially for tough Kiwi roads and the occasional heavy load.
Price
NZ$213.00 including GST. Part number GDB3435.
Fits these vehicles
- Mitsubishi
- Mitsubishi
- Mitsubishi
- Mitsubishi
- Mitsubishi Challenger (1996–1997)
- Mitsubishi Challenger (2008–2015)
- Mitsubishi Challenger (2008+)
- Mitsubishi L200 (2005–2015)
- Mitsubishi L200 (2005–2015)
- Mitsubishi L200 (2006–2009)
- Mitsubishi L200 (2006–2009)
- Mitsubishi L200 (2006–2009)
- Mitsubishi L200 (2006–2009)
- Mitsubishi L200 (2006–2011)
- Mitsubishi L200 (2007–2015)
- Mitsubishi L200 (2007–2015)
- Mitsubishi L200 (2007–2015)
- Mitsubishi L200 (2007–2015)
- Mitsubishi L200 (2008–2015)
- Mitsubishi L200 (2009–2015)
- Mitsubishi L200 (2009–2015)
- Mitsubishi L200 (2010–2015)
- Mitsubishi L200 (2010–2015)
- Mitsubishi L200 (2014+)
- Mitsubishi L200 (2015+)
- Mitsubishi L200 (2015+)
- Mitsubishi Strada (2010–2015)
Description
Mitsubishi L200/Triton Brake Pad Replacement — TRW Edition
> Let's be real, your L200/Triton's brake pads are gonna wear out eventually. All that stopping and starting, especially when you're hauling stuff or hitting the dusty metal tracks, chews through them. Ignoring worn pads? That's just asking for trouble (and maybe a bigger bill later).
Spotting the Warning Signs
• Hear a squeal or grind when you hit the brakes? Not good.
• Braking feels a bit... mushy? Time to investigate.
• Pedal feels soft or spongy? Could be your pads.
• Can actually *see* the pads are looking worse for wear?
• That pesky brake warning light's lit up on the dash?
WOF Woes?
Worn-out brake pads are a surefire way to fail a WOF here in New Zealand. They need to be thick enough to do the job properly and safely. Check the official Land Transport NZ guidelines for the exact legal requirements.
DIY or Call in the Pros?
Difficulty: 6/10
Estimated Time: 2-3 hours
Tools You'll Need: Jack and stands (never skip on safety!), wrench and socket sets, brake cleaner (essential!), C-clamp or brake spreader, torque wrench (for doing it right).
Expert Advice
Look, replacing your brake pads is a no-brainer for keeping your L200/Triton safe on the road. Dodgy pads mean longer stopping distances and potential damage to your rotors. Swing by Bob's Shop; he's always happy to help you figure out the exact part you need for your L200/Triton and give you the rundown.
Fitment Notes
Double-check these pads fit your *specific* L200/Triton model and year. Brake setups can be different! And see if you've got ABS; that can affect the pads you need.
🛠️ Bob's "Get It Done Right" Companion Checklist
Right, before you get stuck in, let's make sure you're sorted. Safety first, always!
• Safety Glasses: Keep those peepers protected from brake dust and flying debris. Safety Glasses
• Nitrile Gloves: Brake cleaner and old brake dust aren't exactly a cafe lunch for your skin. Heavy-duty gloves are the way to go. Nitrile Gloves
• Brake Cleaner: This stuff is gold for blasting away brake dust and grime. Makes the job way easier and safer. Brake Cleaner
• Caliper Grease (Anti-Seize): A wee dab of this on the caliper pins helps everything move smoothly and prevents sticking. Worth its weight in gold. Available at Bob's Shop.
Bob's always here to make sure you get it done right. Head over to Bob's Shop for more tips and quality parts!
---
🛠️ Bob's Pro Tip: Do the Job Right!
> If you're swapping out these parts on your vehicle, don't skimp on fresh rotors. Check out our compatible TRW Disc Brake Rotors (Part No. DF3118S) to ensure a perfect bed-in and get the job done properly first time!
🧰 What Else You'll Need:
• Safety First: Never work under a vehicle supported only by a jack. Always secure it on heavy-duty safety jack stands.
• Brake Dust Protection: Brakes get incredibly dirty. Keep a pack of Nitrile Gloves handy to protect your hands from stubborn brake dust.
• Clean and Prep: Use a high-quality Brake Cleaner spray to blast away stubborn dust, oil, and road grime from the caliper assembly and new rotors before reassembly.
• Lubrication: Apply a thin smear of high-temperature caliper grease to the pad backing plates and slide pins (keep it off the pad friction material!) to prevent squeals and ensure smooth caliper operation.