RDA Phantom Ceramic Brake Pad Set
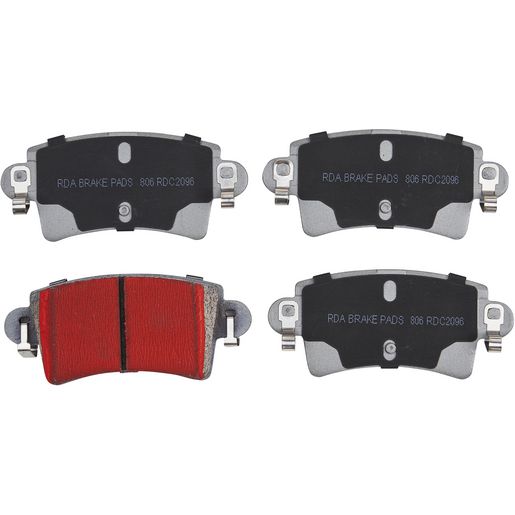
RDA Brakes · Part number RDC2096 · NZ$111.00 incl. GST
Right then, for your trusty Renault Master dCi 120 or dCi 150 van, these RDA brake pads are your ticket to keeping that heavy rig stopping safely and soundly, turning all that go-fast energy into a nice, controlled halt.
Price
NZ$111.00 including GST. Part number RDC2096.
Fits these vehicles
- Renault Master (2001–2007)
- Renault Master (2001–2007)
- Renault Master (2010+)
- Renault Master (2011+)
- Renault Master (2012+)
- Renault Master (2013+)
- Renault Master (2013+)
- Renault Master (2013+)
- Renault Master (2013+)
Description
Brake Pad Swap-Out: Keeping Your Master Van Stopping Sharp!
> Alright team, let's talk brake pads. These aren't just any old bits of kit; they're the unsung heroes that clamp down on your brake discs to bring your beast of a van to a standstill. Especially in a workhorse like the Renault Master, where you're often hauling big loads and hitting the anchors hard, these pads take a real hammering. Ignore 'em, and you're looking at dodgy stopping power and a whole lot of worry.
What's Your Van Telling Ya?
• Hearing squeals, grinds, or even a nasty metallic scrape when you hit the brakes?
• Is your stopping distance feeling a bit like a Sunday drive, or does the pedal feel squishy underfoot?
• Getting a wobble through the steering wheel or pedal when you slow down?
• Does your van pull to one side like it's keen for a cafe lunch when you apply the brakes?
• Is that little brake warning light on the dash trying to get your attention?
WOF Check-Up: Will It Pass?
No chance, mate! If your brake pads are worn thin, your Master will fail its Warrant of Fitness (WOF) faster than you can say 'full stop.' The WOF folks are super strict about brake thickness and performance – it's all about keeping everyone safe on our Kiwi roads.
DIY or Call in the Pros?
Difficulty: 6/10 (A bit of a mission, but totally doable)
Estimated Time: About 1-2 hours per axle – perfect for a Saturday morning.
Tools You'll Need: Your trusty jack, some solid jack stands (safety first!), wheel nut wrench, a C-clamp or brake piston compressor, a spanner set, a torque wrench (don't skimp on this!), brake cleaner, a wire brush, and maybe a brake bleeder kit if things get tricky.
🛠️ Bob's "Get It Done Right" Companion Checklist
Before you dive into that brake job, let's make sure you've got all your ducks in a row for a smooth, safe, and clean operation:
• Safety First, Always!: Grab some Safety Glasses to protect those peepers from flying debris and grim. And never, ever get under your van supported only by a jack! Use proper Jack Stands.
• Keep it Clean: A good blast of Brake Cleaner is essential to get rid of all that grimy brake dust and prep the surfaces. You'll also want some clean rags handy.
• Lubricate Right: Don't forget some anti-seize caliper grease for those new pads and pins – helps everything move freely and prevents future headaches.
• Protect Your Paws: Heavy-duty Nitrile Gloves will keep your hands clean and protected from brake dust and chemicals. Trust me, your hands will thank you later!
Bob's Top Tip
Bob here at CARFIX can't stress this enough: get those brake pads replaced at the very first whisper of wear! Especially for a workhorse like your Renault Master, which is always under load, keeping those brakes tip-top is paramount for safety and performance. These RDA RDC2096 pads are a cracker choice – tough as nails and reliable, even under pressure. Regular checks and timely replacements aren't just good practice; they're vital for everyone's safety.
Bob @ CARFIX is always on hand to help you work out exactly what part you need for your Renault Master. Make sure you head over to Bob's Shop for a chat!
Bits and Bobs on Fitment
These pads are tailor-made for a range of Renault Master dCi models from 2001 onwards, including the dCi 120, dCi 145, and dCi 150 variants. Just make sure you double-check your van's exact year, model, and engine size. Brake systems can be a bit finicky, and you want to ensure a perfect match!
---
🛠️ Bob's Pro Tip: Do the Job Right!
🧰 What Else You'll Need:
• Safety First: Never work under a vehicle supported only by a jack. Always secure it on heavy-duty safety jack stands.
• Brake Dust Protection: Brakes get incredibly dirty. Keep a pack of Nitrile Gloves handy to protect your hands from stubborn brake dust.
• Clean and Prep: Use a high-quality Brake Cleaner spray to blast away stubborn dust, oil, and road grime from the caliper assembly and new rotors before reassembly.
• Lubrication: Apply a thin smear of high-temperature caliper grease to the pad backing plates and slide pins (keep it off the pad friction material!) to prevent squeals and ensure smooth caliper operation.